Saturday, October 22, 2022

TDE Implementation in SQL Server

How to implement TDE in SQL Server Database

Rem: I have taken those steps from YouTube and added its link.

Rem: The author claims no responsibility for the steps explained in this post. In production execute with your own risk.

SQL Server TDE steps:

1. Create the DMK (Database Master Key)
2. Create the certificate
3. Create the Database Encryption Key (DEK)
4. Enable TDE on the user database
5. Back up the certificate and keys


Note:

After you enable TDE, immediately back up the certificate and its associated private key. If the certificate becomes unavailable, or if you restore or attach the database on another server, you need backups of the certificate and private key. Otherwise, you can't open the database.

Keep the encrypting certificate even if you've disabled TDE on the database. Although the database isn't encrypted, parts of the transaction log might remain protected. You also might need the certificate for some operations until you do a full database backup.

Important Views:
sys.dm_database_encryption_keys
sys.certificates (Important column) expiry_date, start_date,name

SELECT name CertName,   certificate_id CertID,   pvt_key_encryption_type_desc EncryptType,
issuer_name Issuer, FROM sys.certificates
WHERE issuer_name = 'MY TDE Certificate';

select c.name, c.start_date, c.expiry_date
from sys.services s
join sys.certificates c on s.principal_id = c.principal_id
where c.pvt_key_encryption_type = 'MK'
and c.is_active_for_begin_dialog = 1
and GETUTCDATE() BETWEEN c.start_date AND c.expiry_date
and s.service_id > 2;

use master
SELECT DB_NAME(database_id) DbName,
  encryption_state EncryptState,
  key_algorithm KeyAlgorithm,
  key_length KeyLength,
  encryptor_type EncryptType
FROM sys.dm_database_encryption_keys;

--Certificate with Expiry date
CREATE CERTIFICATE MYTDE_Prod_TdeCert WITH SUBJECT = 'MYTDE-PROD TDE Certificate', 
START_DATE ='2018-04-10', EXPIRY_DATE='2050-12-31';

--Custom Database Encryption with AES_128 algo
use TESTCompany
GO
CREATE DATABASE ENCRYPTION KEY WITH ALGORITHM = AES_128
ENCRYPTION BY SERVER CERTIFICATE MYTDE_Prod_TdeCert;

--Backup Master Key
BACKUP MASTER KEY 
TO FILE = 'MYPath\MYTDE_Prod_MasterKey_23102022xx.key'
ENCRYPTION BY PASSWORD = 'BObAlice2018$$TDE'

Backup Certificates

BACKUP CERTIFICATE MYTDE_Prod_TdeCert 
TO FILE = 'MYPath\MYTDE_Prod_22102022.cer'
WITH PRIVATE KEY(
  FILE = 'MYPath\MYTDE_Prod_MasterKey_23102022xx.key',
  ENCRYPTION BY PASSWORD = 'BObAlice2018$$TDE');


Credit Goes to URL:

https://www.youtube.com/watch?v=fF57RqmlEBQ
https://www.mssqltips.com/sqlservertip/6980/manage-tde-keys-on-premises-with-sql-data-files-stored-in-azure/
https://learn.microsoft.com/en-us/sql/relational-databases/security/encryption/transparent-data-encryption?view=sql-server-ver16
https://learnsqlserverhadr.com/how-to-enable-transparent-data-encryption-in-an-existing-sql-server-availability-group/

https://www.sqlshack.com/how-to-configure-transparent-data-encryption-tde-in-sql-server/

Saturday, September 17, 2022

Linux Shell Script - AWK usage

Title: Linux Shell Script - AWK usage 

Responsibility: Absolutely no responsibility. Use at your own risk.


awk '1' dbv_*.err  > alldf_mylog.txt


grep -E -w 'DBVERIFY - Verification starting|Total Pages Encrypted' alldf_mylog.txt >>  dbv_enc_apply_status.txt


sed 'N;s/\n/ /' dbv_enc_apply_status.txt > mergeeachDBFin1Line.txt


grep -E -w 'Total Pages Encrypted        : 0' mergeeachDBFin1Line.txt >>  onlyzero.txt


--

----grep -Ril "DBVERIFY - Verification starting : FILE = /oradata3/fcubs/PROD_mds.dbf"


grep 'warning\|error\|critical' /var/log/messages


awk 'NR % 6'            # prints all lines except lines 6,12,18...

awk 'NR > 5'            # prints from line 6 onwards (like tail -n +6, or sed '1,5d')

awk '$2 == "foo"'       # prints lines where the second field is "foo"

awk 'NF >= 6'           # prints lines with 6 or more fields

awk '/foo/ && /bar/'    # prints lines that match /foo/ and /bar/, in any order

awk '/foo/ && !/bar/'   # prints lines that match /foo/ but not /bar/

awk '/foo/ || /bar/'    # prints lines that match /foo/ or /bar/ (like grep -e 'foo' -e 'bar')

awk '/foo/,/bar/'       # prints from line matching /foo/ to line matching /bar/, inclusive

awk 'NF'                # prints only nonempty lines (or: do not print empty lines, where NF==0)

awk 'NF--'              # removes last field and prints the line

awk '$0 = NR" "$0'      # prepends line numbers (assignments are valid in conditions)

awk '!a[$0]++'          # suppresses duplicated lines! (figure out how it works)


[oracle@mysqldbwr1 tde1]$ more xyz.txt

1, Bakht

2, Hayat

3, Hasan Khalil

4, None


=====================================

--print only  second field where data is None" 

awk '$2 =="None"' xyz.txt

--print all records


[oracle@mysqldbwr1 tde1]$ awk '$2 =="None"' xyz.txt

4, None


awk '$1 $2' xyz.txt   ???


=====================================

--print all records

awk '$0' xyz.txt


[oracle@mysqldbwr1 tde1]$ awk '$0' xyz.txt

1, Bakht

2, Hayat

3, Hasan Khalil

4, None


=====================================

--print all records

awk '/Hayat/ || /Hasan/' xyz.txt


[oracle@mysqldbwr1 tde1]$ awk '/Hayat/ || /Hasan/' xyz.txt

2, Hayat

3, Hasan Khalil


=====================================

removes last field and prints the line

awk 'NF--' xyz.txt


1,

2,

3, Hasan

4,

Thursday, September 15, 2022

Oracle dbv Verify output Merge and Check encrypted status

Rem: This script is used to merge output of all datafile dbv status and identify encryption status. 

Rem: This execution requires only in 11g R2 and earlier to verify TDE implementation status

Rem: In 12c, data file header contains TDE implementation status

Note: This script is used for testing purpose, the author claims no responsibility of it.


[oracle@billdb ~]$ vi w.sh


###Hayat code - dbv output filter


cd /home/oracle

rm mydbv.log


echo "-----dbv started for file -------`date +"%Y-%m-%d %T"` " >> mydbv.log

echo "      "     >>  mydbv.log


dbv file=/u01/app/oracle/oradata/BILLDB/avdf_aud_data01.dbf >> mydbv.log 2>&1

dbv file=/u01/app/oracle/oradata/BILLDB/users01.dbf >> mydbv.log 2>&1

dbv file=/u01/app/oracle/oradata/BILLDB/sysaux01.dbf >> mydbv.log 2>&1

dbv file=/u01/app/oracle/oradata/BILLDB/undotbs01.dbf >> mydbv.log 2>&1


echo "  "     >>  mydbv.log

echo "--------------------dbv ended for files ---------------`date +"%Y-%m-%d %T"`" >> mydbv.log


##### filter revlent data


rm /home/oracle/dbv_enc_apply_status.txt


echo " ----------- filter DB verify encryption checking started -----------`date +"%Y-%m-%d %T"`"     >>  dbv_enc_apply_status.txt

echo " "     >>  dbv_enc_apply_status.txt


grep -E -w 'DBVERIFY - Verification starting|Total Pages Encrypted' mydbv.log >>  dbv_enc_apply_status.txt


echo "    "     >>  dbv_enc_apply_status.txt

echo " ----------- filter DB verify encryption checking ended -----------`date +"%Y-%m-%d %T"`"     >>  dbv_enc_apply_status.txt


Extra command to merge multiple files: 

If parallel log files generated for large number of data files

cat mylog*.txt >> alldf_mylog.txt

Or

$ cat file1 file2 file3 file4 file5  > alldf_mylog.txt

Or

for i in mylog*.txt ;   do cat $i >> alldf_mylog.txt ;  done

Or

awk '1' mylog*.txt  > alldf_mylog.txt


Wednesday, August 24, 2022

Exadata Diagnostic Support Tools


Below are Tools available in Exadata, to upload logs to identify the issue. With updated models, tools may add / remove / merge. Please always refer to Oracle.com for latest update.


Note: This document is prepared by my friend Mr. Bakht Ali Khan (Oracle DBA).


1. SOSReport:

   ==========

   The is a tool to collect troubleshooting data on an Oracle Linux system.

   Among other Info its also includes about the installed rpm versions, syslog, network configuration, 

   mounted filesystems, disk partition details, loaded kernel modules and status of all services


   # rpm -qa | grep -i sos => To check rpm installation

   # yum install sos => Installing sos rpm

   # sosreport => Generating sos report

     --  

   # /opt/oracle.SupportTools/sundiag.sh -h


   How To Collect Sosreport on Oracle Linux (Doc ID 1500235.1)  


2. OSWatcher:

   ==========


   Oracle OSWatcher is a utility that collects data from commands such as vmstat, iostat, top, ps, netstat, 

   HP-UX sar, and Linux meminfo etc. OSWatcher archives the data files, automatically looks for issues, 

   and helps to determine the root cause of the issues, if possible.  


   Can download as standalone (osw<version>.tar) or Part of TFA support tool


   Doc - 301137.1 : OSWatcher (Includes: [Video])


3. ExaWatcher:

   ===========


   ExaWatcher produces a small set of charts when a collection is done. These charts are contained in the   Charts.ExaWatcher.<nodeName> directory within the collection. Charts can only be generated for the  following ExaWatcher collections:

   vmstat, iostat, mpstat, IBCardInfo, zonestat, meminfo, ldm, kstat etc

   The computer where you are viewing the charts must be connected to the internet.


   # ps -ef | grep -i ExaWatcher

   # cd /opt/oracle.ExaWatcher/

   # ./GetExaWatcherResults.sh --from 08/15/2022_13:00:00 --to 08/15/2022_14:00:00

     OR

   # /opt/oracle.ExaWatcher/GetExaWatcherResults.sh --from 10/14/2014_13:00:00 --to 10/14/2014_17:00:00

   # /opt/oracle.ExaWatcher/archive/ExtractedResults => (output directory)

   # cd  /opt/oracle.ExaWatcher/archive/ExtractedResults

   # ls -la

   # du -sh *


   File size should more than 10M or 100M


   Doc - 1617454.1 : ExaWatcher Utility On Exadata and SuperCluster Compute and Storage Nodes 


4. SUNDIAG:

   ========

   Oracle Exadata Diagnostic Information required for Disk Failures and some other Hardware issues.

   sundiag is an Exadata node/cell tool.  It works on both Linux and Solaris installations.

   Execution will create a date stamped tar.bz2 file in /tmp/sundiag_/tar.bz2. Upload this on SR.


   Run as root on the compute node or cell server:

      # /opt/oracle.SupportTools/sundiag.sh -h (Help to see detail)

      # /opt/oracle.SupportTools/sundiag.sh [ilom | snapshot] [osw <time ranges>]

     --

   # /opt/oracle.SupportTools/sundiag.sh

   # /opt/oracle.SupportTools/sundiag.sh ilom

   # /opt/oracle.SupportTools/sundiag.sh snapshot

   # /opt/oracle.SupportTools/sundiag.sh osw <from>-<to> e.g <date>_<time>-<date>_<time>

   # /opt/oracle.SupportTools/sundiag.sh osw 2014/03/31_15:00:00-2014/03/31_18:00:00 (Not < 9 hours)


x.  Procwatcher:

    ============

It is a tool to examine and monitor Oracle database and/or clusterware processes at an interval.   

The tool will collect stack traces of these processes using Oracle tools like oradebug short_stack 

and/or OS debuggers like pstack, gdb, dbx, or ladebug and collect SQL data if specified.

This tool can be used in conjunction with other tools or troubleshooting methods depending on the situation.

To install the script, simply download it put it in its own directory, unzip it, and give it execute permissions.

$ ./prw.sh stat - To check status

$ tfactl prw stat - To check the status if running inside of TFA.

$ ./prw.sh start - To start Procwatcher

$ ./prw.sh pack - To package up Procwatcher files to upload to support

Doc - 459694.1 : Procwatcher: Script to Monitor and Examine Oracle DB and Clusterware Processes

Procwatcher is Ideal for:


    Session level hangs or severe contention in the database/instance. See Note: 1352623.1

    Severe performance issues. See Note: 1352623.1

    Instance evictions and/or DRM timeouts.

    Clusterware or DB processes stuck or consuming high CPU (must set EXAMINE_CLUSTER=true and run as root for clusterware processes)

    ORA-4031 and SGA memory management issues. (Set sgamemwatch=diag or sgamemwatch=avoid4031 (not the default). See Note: 1355030.1

    ORA-4030 and DB process memory issues. (Set USE_SQL=true and process_memory=y).

    RMAN slowness/contention during a backup. (Set USE_SQL=true and rmanclient=y).


   5. ORAchk:

   =======


6. Exachk:

   =======

   Exachk is an Oracle Exadata diagnostic tool that comes with different levels of verification and

   collects hardware, software, firmware, Network Fabric Switches and configuration data on Exa systems.

   In addition to the automatic correction feature, individual checks have explanations, recommendations, 

   and manual verification commands so that customers and administrators can evaluate the risks of 

   and self-correct reported conditions.


   # ps -ef | grep exachk

   # cd /opt/oracle.SupportTools

   # ./exachk -d status

   # ./exachk -v


   How do I install only ORAchk or EXAchk without TFA?

   We can install with the following command, which will not install or alter any existing TFA installlation:

   # ahf_setup (Installation clude TFA, ORAchk, Exachk etc)

   # tfactl version -all

   # ahf_setup -extract orachk (Installation included only ORAchk)

   # ahf_setup -extract exachk (Installation included only Exachk)


   TFA, ORAchk & EXAchk work just the same as before. AHF is simply a combined installer for them.

   TFA is still the primary tool for diagnostic collection and management. ORAchk/EXAchk is still 

   the primary tool for proactively checking your system.

   The move to AHF is intended to make it easier, with a single installation with all tools in a single location.


7. ADR:

   ====

   The Automatic Diagnostics Repository (ADR) is a hierarchical file-based repository for handling diagnostic information.


   sql> select name,value from v$diag_info;


   $ adrci    

   $ adrci> SHOW PROBLEM 

   $ adrci> SHOW INCIDENT 

   $ adrci> SHOW CONTROL


   Doc - 422893.1 : Understanding Automatic Diagnostic Repository 

8. Oracle Trace File Analyzer (TFA):

   =================================

   Oracle Trace File Analyzer (TFA) provides a number of diagnostic tools in a single bundle, making it easy 

   to gather diagnostic information about the Oracle database and clusterware, which in turn helps with problem 

   resolution when dealing with Oracle Support.  


9. Autonomous Health Framework (AHF):   

   ==================================

   The Trace File Analyzer (TFA) is now part of the Autonomous Health Framework (AHF) described. AHF is collection of

   many tools i.e. EXAchk, ORAchk etc

 Oracle AHF is a collection of components that analyzes the diagnostic data collected, and proactively identifies issues 

   before they affect the health of your Database, clusters or your Oracle Real Application Clusters databases.


x. References:

 Doc - 1539451.1 : How to shutdown the Exadata database nodes and storage cells in a rolling fashion so certain hardware tasks can be performed. 

 Doc - 1093890.1 : Steps To Shutdown/Startup The Exadata & RDBMS Services and Cell/Compute Nodes On An Exadata Configuration

Doc - 19c E95727-09 - April 2021 : Clusterware Administration and Deployment Guide 

Doc - 1683842.1 : SRDC - EEST Sundiag

Doc -  761868.1 : Oracle Exadata Diagnostic Information required for Disk Failures and some other Hardware issues

Doc - 2799587.1 : Gathering sundiag in Exadata image version 20.1.11 and 20.1.12 fail with syntax error

 Doc - 1070954.1 : Oracle Exadata Database Machine EXAchk

Doc - 2673298.1 : How To Restart Exachk Daemon

Doc - 2550798.1 : Autonomous Health Framework (AHF) - Including TFA and ORAchk/EXAchk 


Monday, August 22, 2022

Oracle Audit Vault and Database Firewall (AVDF) 20.7 - Part 2

Agent installation for Oracle Database 


----Install Agent 

Step#1

chown oracle:oinstall agent.jar

export JAVA_HOME=$ORACLE_HOME/jdk

export PATH=$JAVA_HOME/bin:$PATH


Step#2

Make directory:

/u01/app/oracle/avdf_agent


Step#3

Download agent.jar file from AVDF console


Step#4

[oracle@billdb jdk]$ cd /u01/app/oracle/avdf_agent

[oracle@billdb avdf_agent]$ java -jar agent.jar -d /u01/app/oracle/avdf_agent

Agent installed successfully.

If deploying hostmonitor please refer to product documentation for additional installation steps.

[oracle@billdb avdf_agent]$


Start agent:
Use the activation key mentioned in step#3

BILLDB::OIX2-KFAA-IY8M-PLW#-0SA9

[oracle@billdb bin]$ ./agentctl start -k
Enter Activation Key:
Checking for updates...
Agent is updating. This operation may take a few minutes. Please wait...
Agent updated successfully.
Agent started successfully.
[oracle@billdb bin]$


Verify agent status:
[oracle@billdb bin]$ pwd
/u01/app/oracle/avdf_agent/bin
[oracle@billdb bin]$ ./agentctl status
Agent is running.
[oracle@billdb bin]$


Step#5
Login as superuser and verify agent status


Step#6
Perform below steps in target DB (BILLDB)

sqlplus as sysdba

create user avdfuser identified by Oracle_123;


[oracle@billdb config]$ pwd
/u01/app/oracle/avdf_agent/av/plugins/com.oracle.av.plugin.oracle/config
[oracle@billdb config]$ sqlplus / as sysdba
Version 19.3.0.0.0

SQL> show user
USER is "SYS"
SQL> show parameter db_name

NAME      TYPE VALUE
------------------------------------ ----------- ------------------------------
db_name      string billdb

--SETUP for granting Audit Collection and Audit Policy Management privileges
SQL> start /u01/app/oracle/avdf_agent/av/plugins/com.oracle.av.plugin.oracle/config/oracle_user_setup.sql AVDFUSER SETUP

Session altered.

Enter username for granting privileges:
Setting username to 'AVDFUSER'

Enter mode (SETUP/SPA/ENTITLEMENT):
SETUP for granting Audit Collection and Audit Policy Management privileges
SPA for granting Stored Procedure Auditing privileges
ENTITLEMENT for granting Entitlement retrieval privileges
Setting mode to 'SETUP'

Granting privileges to "AVDFUSER" ... Done.
Disconnected from Oracle Database 19c Enterprise Edition Release 19.0.0.0.0 - Production
Version 19.3.0.0.0
[oracle@billdb config]$ 


--SPA for granting Stored Procedure Auditing privileges
[oracle@billdb config]$ sqlplus / as sysdba
SQL> start /u01/app/oracle/avdf_agent/av/plugins/com.oracle.av.plugin.oracle/config/oracle_user_setup.sql AVDFUSER SPA

Session altered.

Enter username for granting privileges:
Setting username to 'AVDFUSER'

Enter mode (SETUP/SPA/ENTITLEMENT):
SETUP for granting Audit Collection and Audit Policy Management privileges
SPA for granting Stored Procedure Auditing privileges
ENTITLEMENT for granting Entitlement retrieval privileges
Setting mode to 'SPA'

Granting privileges to "AVDFUSER" ... Done.
Disconnected from Oracle Database 19c Enterprise Edition Release 19.0.0.0.0 - Production
Version 19.3.0.0.0


--ENTITLEMENT for granting Entitlement retrieval privileges
[oracle@billdb config]$ sqlplus / as sysdba

start /u01/app/oracle/avdf_agent/av/plugins/com.oracle.av.plugin.oracle/config/oracle_user_setup.sql AVDFUSER ENTITLEMENT
Session altered.

Enter username for granting privileges:
Setting username to 'AVDFUSER'

Enter mode (SETUP/SPA/ENTITLEMENT):
SETUP for granting Audit Collection and Audit Policy Management privileges
SPA for granting Stored Procedure Auditing privileges
ENTITLEMENT for granting Entitlement retrieval privileges
Setting mode to 'ENTITLEMENT'

Granting privileges to "AVDFUSER" ... Done.
Disconnected from Oracle Database 19c Enterprise Edition Release 19.0.0.0.0 - Production
Version 19.3.0.0.0


Step#7

select granted_role from dba_role_privs where grantee='AVDFUSER';
GRANTED_ROLE
--------------------------------------------------------------------------------
AUDIT_ADMIN
AUDIT_VIEWER
RESOURCE


select privilege from dba_sys_privs where grantee='AVDFUSER';
PRIVILEGE
----------------------------------------
AUDIT ANY
AUDIT SYSTEM
CREATE SESSION


Step#8

col owner format a10
col table_name format a15
col tablespace_name format a12
col interval format a20
set lines 300
select owner,table_name,interval,partitioning_type,partition_count,def_tablespace_name from dba_part_Tables where owner='AUDSYS';


SQL> 
create tablespace avdf_aud_data
datafile '/u01/app/oracle/oradata/BILLDB//avdf_aud_data01.dbf' size 2048m;

BEGIN
DBMS_AUDIT_MGMT.SET_AUDIT_TRAIL_LOCATION(
audit_trail_type => dbms_audit_mgmt.audit_trail_unified,
audit_trail_location_value => 'AVDF_AUD_DATA');
END;
/


BEGIN
DBMS_AUDIT_MGMT.INIT_CLEANUP(
AUDIT_TRAIL_TYPE => DBMS_AUDIT_MGMT.AUDIT_TRAIL_ALL,
DEFAULT_CLEANUP_INTERVAL => 1 );
END;
/

BEGIN
DBMS_AUDIT_MGMT.CREATE_PURGE_JOB (
AUDIT_TRAIL_TYPE => DBMS_AUDIT_MGMT.AUDIT_TRAIL_ALL,
AUDIT_TRAIL_PURGE_INTERVAL => 1,
AUDIT_TRAIL_PURGE_NAME => 'CLEANUP_OS_DB_AUDIT_RECORDS',
USE_LAST_ARCH_TIMESTAMP => TRUE );
END;
/

PL/SQL procedure successfully completed.

SQL> select owner,table_name,interval,partitioning_type,partition_count,def_tablespace_name from dba_part_Tables where owner='AUDSYS';
AUDSYS
AUD$UNIFIED
INTERVAL '1' MONTH
RANGE             1048575 AVDF_AUD_DATA


Step#9

Login as superaudit user


Step#10

Issues Faced:
Retrieving Audit Setting Using AVDF Fails With 'Failed to connect to DB' Error (Doc ID 2589826.1)

Added target DB tns entry in AVDF Appliance machine.

1. Connect to the AV Server "support" account via a terminal session (like putty)
2. Execute: su - root
3. Execute: su - oracle
4. Execute: /usr/local/dbfw/bin/javafwk stop
5. Execute: /usr/local/dbfw/bin/javafwk start
6. Check to see if java process is executing: ps -ef | grep java.
7. If there is a java process go to step 9
8. If there no java process, please create a Service Request with Support.
9. Connect to the AV Console as the AV Admin and stop and start the AV Audit Trails.


Sunday, August 21, 2022

Oracle Audit Vault and Database Firewall (AVDF) 20.7 - Part 1


Installation of Oracle AVDF 20.7 Installation on Oracle Virtual Box

Oracle Audit Vault and Database Firewall (AVDF) is a complete Database Activity Monitoring (DAM) solution that combines native audit data with network-based SQL traffic capture. AVDF includes an enterprise quality audit data warehouse, host-based audit data collection agents, powerful reporting and analysis tools, alert framework, audit dashboard, and a multi-stage Database Firewall. The Database Firewall uses a sophisticated grammar analysis engine to inspect SQL statements before they reach the database and determines with high accuracy whether to allow, log, alert, substitute, or block the incoming SQL. AVDF comes with collectors for Oracle Database, Oracle MySQL, Microsoft SQL Server, PostgreSQL, IBM Db2 (on LUW), SAP Sybase, Oracle Key Vault, Microsoft Active Directory, Linux, Windows, AIX, Solaris, and HPUX. A Quick-JSON collector simplifies ingesting audit data from databases like MongoDB. In addition to the provided collectors, AVDF's extensible framework allows simple configuration-based audit collection from JDBC-accessible databases and REST, JSON, or XML sources, making collection from most other systems easy. A full featured Java SDK allows creation of collectors for applications or databases that don't use a standard technology to record their audit trail [https://www.oracle.com/].

Features:

1.    Fine-Grained, Customizable Reporting, and Alerting
2.    Enterprise Audit Data Consolidation and Lifecycle Management
3.    Deployment Flexibility and Scalability


Figure AVDF Architecture (https://docs.oracle.com)

LAB Environment:

OS: OE Linux 7.9

Virtual Box: 6.1.36

Note: For newer versions, the installation screen may change.

Step#1: Media selection from Oracle (https://edelivery.oracle.com/) 

**Valid CSI-based account required


Type AVDF 20.7 and Press Search


Step#2: VM (AVDF appliance) Creation in Virtual BOX

Recommendations 450 GB disk space
8GB RAM
*** if above storage and memory not available, installation will not continue.


AVDF ISO image selection from downloaded media, and Press Ok


Step#3: AVDF Installation
Note: It will take approximately 3+ hours, on local desktop/laptop machine


AVDF Appliance installation screen and Press ENTER


No input required, Just watch and see


Step#4: Root Password and IP address requirement


Important Screen, verify the information before proceeding


Press Ok, no input required for next few screens


Almost last step, Installation successfully completed, Congratulation!


Enter root password entered previously


Verify OS level Services
ASM and DB instance


First-time logon as Root user


Step#5: Password change for Superuser

Enter the password for various users, and note their password it will be required later on in AVDF administration.


In the next blog, we will discuss agent installation and configurations.


Credit goes to below URLs:
URLs:
https://docs.oracle.com/en/database/oracle/audit-vault-database-firewall/20/sigig/install.html#GUID-A295ABF9-E2D5-4E52-BB4E-A7B68119B065
https://christian-gohmann.de/2020/12/21/installation-of-database-firewall-20-1/
https://asktom.oracle.com/pls/apex/f?p=100:551::::551:P551_CLASS_ID,P551_INVITED:17425,N&cs=16B63BD8CBB6E642C1CA65A1829F3ED7F
https://www.youtube.com/watch?v=dFeyVmfAu78
https://gavinsoorma.com.au/knowledge-base/oracle-audit-vault-database-firewall-20-4-part-1
https://eclipsys.ca/oracle-audit-vault-20-4-part-1-installation/


Wednesday, August 17, 2022

ASM Disk adding in Virtual Box 6.1


How to add new ASM disk in virtual box


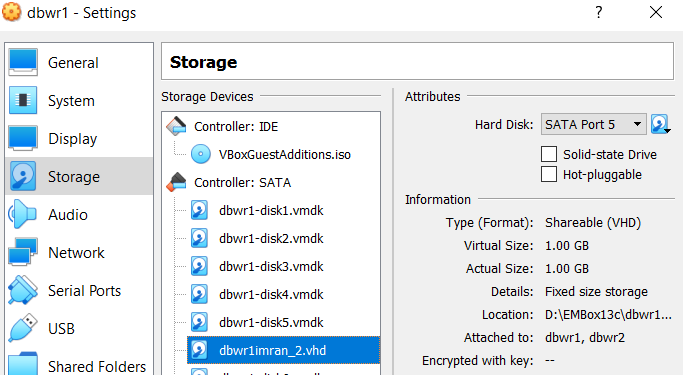
Step#1

Create shared disk


Step#2

Mount on Node 1 and Node2


Step#3


Step#4

Format Newly added disk

fdisk -l

fdisk /dev/sdh           *** disk shown by fdisk -l

n, p, default, default, default, w


Step#5

Perform on node 1

oracleasm scandisks

oracleasm listdisks

oracleasm createdisk  ASM_IMRAN  /dev/sdh1


Step#7

Perform  on node 2

oracleasm scandisks

oracleasm listdisks


Step#8

Using ASMCA, Create Disk group, and mount it on all nodes


Removing:

sysasm:

SQL> drop diskgroup DGIK including contents


[root@dbwr1 ~]# oracleasm deletedisk ASM_IMRAN

Clearing disk header: done

Dropping disk: done


[root@dbwr1 ~]# oracleasm listdisks

ASMDISK_DATA

ASMDISK_OCR

ASMDISK_RECO

[root@dbwr1 ~]# 


[root@dbwr1 ~]#


Friday, August 12, 2022

Oracle Database Vault in 12.2.0.1 - Part 5

 Database Vault  RULESET (Complete) Example without GUI.

Note: This code is for test education purposes only and the idea is taken from the book "Oracle 11g Anti-hacker's Cookbook" Chapter 7.


Create RULESET for "end of the month reporting". It will only allow creating a view in the HR schema on the last day of every month only.


sqlplus c##dbowner1/PAkistan123##@BILL_PDB1


--- Create Rule: Evaluate to HR user sessions only

BEGIN

DVSYS.DBMS_MACADM.CREATE_RULE(

rule_name => 'Rule_Evaluate_HR_user',

rule_expr => 'SYS_CONTEXT(''USERENV'',''SESSION_USER'') = ''HR'''

);

END;

/

--- Create Rule: Evaluate to Last Month of the day

BEGIN

DVSYS.DBMS_MACADM.CREATE_RULE(

rule_name  => 'Rule_Evaluate_Is_lastdayofmonth',

rule_expr =>'(LAST_DAY(TRUNC(SYSDATE)) - TRUNC(SYSDATE)) = 0'  

);

END;

/

------ Create Ruleset as Ruleset_Month_End

----- This ruleset restrict VIEW creation in HR schema only due to sub-rule "Rule_Evaluate_HR_user"

BEGIN

DVSYS.DBMS_MACADM.CREATE_RULE_SET(

rule_set_name => 'Ruleset_Month_End',

description => 'Create views for end of the month reporting',

enabled => DVSYS.DBMS_MACUTL.G_YES,

eval_options => DBMS_MACUTL.G_RULESET_EVAL_ALL, -- all rules must be true,

audit_options => DBMS_MACUTL.G_RULESET_AUDIT_FAIL, -- no audit

fail_options => DBMS_MACUTL.G_RULESET_FAIL_SILENT,

fail_message => 'You are not allowed to create reports until the end of the month',

fail_code => 20999,

handler_options => DBMS_MACUTL.G_RULESET_HANDLER_OFF,

handler => NULL

);

END;

/

--- Add Rules created above to to Ruleset

BEGIN

  DBMS_MACADM.ADD_RULE_TO_RULE_SET(

     rule_set_name => 'Ruleset_Month_End',

        rule_name => 'Rule_Evaluate_HR_user',

        rule_order => 1

);

 DBMS_MACADM.ADD_RULE_TO_RULE_SET(

        rule_set_name => 'Ruleset_Month_End',

        rule_name => 'Rule_Evaluate_Is_lastdayofmonth',

        rule_order => 1

);

END;

/


--- Add Command to Ruleset "Ruleset_Month_End" to restrict CREATE View command

BEGIN

  DBMS_MACADM.CREATE_COMMAND_RULE (

     command => 'CREATE VIEW',

     rule_set_name => 'Ruleset_Month_End',

     object_owner => 'HR',

     object_name => '%',

     enabled => DBMS_MACUTL.G_YES);

END;

/


--- Logon as HR and Verify if HR user allowed to create View 

sqlplus HR/PAkistan123##@BILL_PDB1


SQL> create or replace view salaries_and_commissions as select

first_name,last_name,salary,commission_pct from employees where

commission_pct is not null;  2    3

first_name,last_name,salary,commission_pct from employees where

                                                *

ERROR at line 2:

ORA-47306: 20999: You are not allowed to create reports until the end of the

month


SQL> select sysdate from dual;

SYSDATE

---------

12-AUG-22 >>>>> It is not month end


---------------------------------

For other users like scott etc

---------------------------------

SQL> show user

USER is "SCOTT"

SQL> select sysdate from dual;

SYSDATE

---------

12-AUG-22


SQL>  create view vtst2 as select * from stest;

View created.


--- Connect as SYS user, and Change date to Last month

SQL> CONN SYS/PAkistan123##@BILL_PDB1 AS SYSDBA

Connected.

SQL> ALTER SYSTEM SET FIXED_DATE='31-AUG-2022';

System altered.


---  Logon as HR again, and verify if View creation is allowed

sqlplus hr/PAkistan123##@BILL_PDB1

SQL> select sysdate from dual;

SYSDATE

---------

31-AUG-22


SQL> create or replace view salaries_and_commissions as select

first_name,last_name,salary,commission_pct from employees where

commission_pct is not null;  2    3


View created.


==============================


---  The user with the DBV_ACCTMGR role can only grant the connect role

SQL> conn sys/PAkistan123##@BILL_PDB1 as sysdba

Connected.

SQL> grant create table to scott;

Grant succeeded.

SQL>


Views to verify:

select * from DVSYS.DBA_DV_RULE_SET WHERE RULE_SET_NAME IN ('Ruleset_Month_End')

SELECT * FROM DVSYS.DBA_DV_COMMAND_RULE WHERE RULE_SET_NAME IN ('Ruleset_Month_End');

SELECT * FROM DVSYS.DBA_DV_COMMAND_RULE WHERE COMMAND IN ('CREATE TABLE');

SELECT * FROM DVSYS.DBA_DV_RULE WHERE NAME in ('Rule_Evaluate_HR_user','Rule_Evaluate_Is_lastdayofmonth')

select * from DVSYS.DBA_DV_REALM;

select * from DVSYS.DBA_DV_REALM_AUTH;

select * from DVSYS.DBA_DV_REALM_OBJECT;


Credit Goes to:

https://netsoftmate.com/enable-database-vault-on-rac-database/

https://www.oreilly.com/library/view/oracle-11g-anti-hackers/9781849685269/ch07s02.html

Thursday, August 11, 2022

Oracle Database Vault in 12.2.0.1 - Part 4

 Database Vault RULESET usage examples without GUI.

Note: This code is for test education purposes only.

Ruleset Definition:

As their name denotes, rulesets are a collection of rules that in turn consist of logical statements, which might evaluate to true or false. Because of their capacity for evaluation, rulesets can be associated with command rules, realm authorization, and factor assignment, as well as secure application roles. According to the true and false value of the rule, the value of the rule set itself is either "true" or "false". There are two choices: ALL or ANY. When defining command rules or authorizing a user to access a certain field, a certain set of rules can be set as a condition. When the user executes the SQL command defined in the command rule, Vault first calculates the associated rule set. If the rule set value is "true", the command is allowed to be executed, and if the value of the rule set is "false", the execution is rejected


sqlplus /nolog

conn c##dbowner1/PAkistan123##@BILL_PDB1


Create Ruleset...Reporting from HR Views


BEGIN

DVSYS.DBMS_MACADM.CREATE_RULE_SET(

rule_set_name => 'Reporting from HR Views',

description => 'Reporting from HR Views',

enabled => DVSYS.DBMS_MACUTL.G_YES,

eval_options => DBMS_MACUTL.G_RULESET_EVAL_ALL, -- all rules must be true,

audit_options => DBMS_MACUTL.G_RULESET_AUDIT_FAIL, -- no audit

fail_options => DBMS_MACUTL.G_RULESET_FAIL_SILENT,

fail_message => 'You are not allowed to report from this view',

fail_code => 20998,

handler_options => DBMS_MACUTL.G_RULESET_HANDLER_OFF,

handler => NULL

);

END;

/

PL/SQL procedure successfully completed.


--------------------------------

SQL> conn c##dbmanager1/PAkistan123##@BILL_PDB1

Connected.

SQL> create user hayat identified by PAkistan123##;

User created.


SQL> grant create session,connect to hayat;

Grant succeeded.


--------------------------------


Evaluate HAYAT user


BEGIN

DVSYS.DBMS_MACADM.CREATE_RULE(

rule_name => 'Rule_Hayat',

rule_expr => 'SYS_CONTEXT(''USERENV'',''SESSION_USER'') = ''HAYAT'''

);

END;

/

PL/SQL procedure successfully completed.


--------------------------------

SQL> conn HR/PAkistan123##@BILL_PDB1

Connected.

SQL>

SQL>

SQL> grant select on emp_details_view to hayat;

Grant succeeded.


--------------------------------

BEGIN

 DVSYS.DBMS_MACADM.DELETE_COMMAND_RULE(

  command      => 'SELECT',

  object_owner => 'HR',

  object_name  => 'EMP_DETAILS_VIEW');

END;

/

--------------------------------

SQL> CONN hayat/PAkistan123##@BILL_PDB1

Connected.


SQL> select first_name,last_name from hr.emp_Details_view where employee_id=100;

FIRST_NAME           LAST_NAME

-------------------- -------------------------

Steven               King


--------------------------------

SQL> conn scott/PAkistan123##@BILL_PDB1

Connected.

SQL> select first_name,last_name from hr.emp_Details_view where employee_id=100;

select first_name,last_name from hr.emp_Details_view where employee_id=100

                                    *

ERROR at line 1:

ORA-00942: table or view does not exist


SQL> conn hr/PAkistan123##@BILL_PDB1

Connected.

SQL> grant select on emp_details_view to scott;

Grant succeeded.


SQL> conn c##dbowner1/PAkistan123##@BILL_PDB1

--if HR_REALM exist for SCOTT user

BEGIN

 DBMS_MACADM.DELETE_AUTH_FROM_REALM(

  realm_name => 'HR_Realm',

  grantee    => 'SCOTT');

END;

/


BEGIN

DVSYS.DBMS_MACADM.CREATE_RULE(

rule_name => 'Rule_Scott',

rule_expr => 'SYS_CONTEXT(''USERENV'',''SESSION_USER'') = ''SCOTT'''

);

END;

/


SQL> conn scott/PAkistan123##@BILL_PDB1


SQL> select first_name,last_name from hr.emp_Details_view where employee_id=100;


FIRST_NAME           LAST_NAME

-------------------- -------------------------

Steven               King


SQL>  SELECT NAME FROM DVSYS.DBA_DV_REALM;

NAME

--------------------------------------------------------------------------------

Database Vault Account Management

HR_Realm 

Oracle Database Vault

Oracle Default Component Protection Realm

Oracle Default Schema Protection Realm

Oracle Enterprise Manager

Oracle System Privilege and Role Management Realm


--Delete Existing REALM Created by SupportPartnet:

EXEC DBMS_MACADM.DELETE_REALM('HR_Realm');


  SELECT NAME, AUDIT_OPTIONS, ENABLED FROM DVSYS.DBA_DV_REALM 

  WHERE AUDIT_OPTIONS = '1';


Enable DROP TABLE command rule at Database Level

---------------------------------------------------------------------------

SQL>  conn c##dbowner1/PAkistan123##@BILL_PDB1

Connected.

SQL> begin

dbms_macadm.update_command_rule(command=>'DROP TABLE',rule_set_name=>'Disabled',object_owner=>'HR',object_name=>'%',enabled=>dbms_macutl.g_no);

end;

/

PL/SQL procedure successfully completed.


SQL> conn hr/PAkistan123##@BILL_PDB1

Connected.

SQL>  create table test1 (r number);


Table created.


SQL> drop table test1;

Table dropped.


Important Views:

set lines 132 pages 2300

col os_username format a15

col username format a15

col userhost format a15

col ACTION_COMMAND format a45

col audit_option format a10

alter session set nls_date_format = 'DD.MM.YYYY HH24:MI:SS';


select audit_option,os_username,username,userhost,timestamp,action_command from dvsys.audit_trail$;


Part 5 (RULESET Complete end to end example): 

https://hayatkhan75.blogspot.com/2022/08/oracle-database-vault-in-12201-part-5.html


Credit Goes to:


http://oradbakar.blogspot.com/2011/12/database-vault-step-by-step-example.html
https://docs.oracle.com/cd/E18283_01/server.112/e16544/apis_dbms_macadm.htm
https://blog.actorsfit.com/a?ID=01450-3eca16ce-66a2-47e5-8671-1a072f790062
https://www.oreilly.com/library/view/oracle-11g-anti-hackers/9781849685269/ch07s02.html

Oracle Database Vault in 12.2.0.1 - Part 3


Database Vault COMMAND RULE usage examples without GUI.

Note: This code is for test education purposes only.


User Case#1 [Restrict access to DROP TABLE in any schema]


SQL> Connect c##dbowner1/PAkistan123##@BILL_PDB1

SQL> SHOW USER
USER is "C##DBOWNER1"
SQL> begin
dbms_macadm.create_command_rule(command=>'DROP TABLE',rule_set_name=>'Disabled',object_owner=>'HR',object_name=>'%',enabled=>dbms_macutl.g_yes);
end;  
/

PL/SQL procedure successfully completed.

Command=>DROP TABLE
Rule Set=>Disable
Object Owner=>%
Object Name"=>%
Status=>Enabled


---Now try and create table and than drop it

Conn HR/Password:::::@BILL_PDB1


SQL> create table test (empno number, ename varchar2(30));

Table created.

SQL> drop table test;
drop table test
*
ERROR at line 1:
ORA-47400: Command Rule violation for DROP TABLE on HR.TEST


User Case#2  [Restrict access to View  EMP_DETAILS_VIEW ]

Conn HR/Password:::::

create or replace view test_Command_rule as select first_name,last_name from employees;

SQL> Connect c##dbowner1/PAkistan123##@BILL_PDB1
SQL> begin
dbms_macadm.create_command_rule(command=>'SELECT',rule_set_name=>'Disabled',object_owner=>'HR',object_name=>'EMP_DETAILS_VIEW',enabled=>dbms_macutl.g_yes);
end;  /

PL/SQL procedure successfully completed.


Conn HR/Password:::::

SQL> select first_name,last_name from emp_details_view where employee_id=100;
select first_name,last_name from emp_details_view where employee_id=100
                                 *
ERROR at line 1:
ORA-01031: insufficient privileges

---- DROP the command rule and verify 
SQL> BEGIN
 DVSYS.DBMS_MACADM.DELETE_COMMAND_RULE(
  command      => 'SELECT',
  object_owner => 'HR',
  object_name  => 'EMP_DETAILS_VIEW');
END;
/

PL/SQL procedure successfully completed.

Conn HR/Password:::::

SQL> select first_name,last_name from emp_details_view where employee_id=100;

FIRST_NAME           LAST_NAME
-------------------- -------------------------
Steven               King


User Case#3 [Restrict access to CREATE TABLE command]

SQL> Connect c##dbowner1/PAkistan123##@BILL_PDB1
begin
dbms_macadm.create_command_rule(command=>'CREATE TABLE',rule_set_name=>'Disabled',object_owner=>'HR',object_name=>'%',enabled=>dbms_macutl.g_yes);
end;
/

Conn HR/Password:::::

SQL> CREATE TABLE TEST2 (StudentID number);
CREATE TABLE TEST2 (StudentID number)
*
ERROR at line 1:
ORA-47400: Command Rule violation for CREATE TABLE on HR.TEST2


Disable Command Rule and Allow Table Creation


SQL> BEGIN
 DVSYS.DBMS_MACADM.UPDATE_COMMAND_RULE(
  command         => 'CREATE TABLE',
  rule_set_name   => 'Disabled',
  object_owner    => 'HR',
  object_name     => '%',
  enabled         => DBMS_MACUTL.G_NO);
END;
/  

PL/SQL procedure successfully completed.


Conn HR/Password:::::
SQL>  CREATE TABLE TEST2 (StudentID number);

Table created.


Disable Command Rule and Allow Table Drop Activity at Database Level

SQL>  conn c##dbowner1/PAkistan123##@BILL_PDB1
Connected.
SQL> begin
dbms_macadm.update_command_rule(command=>'DROP TABLE',rule_set_name=>'Disabled',object_owner=>'HR',object_name=>'%',
enabled=>dbms_macutl.g_no);
end;
/  

PL/SQL procedure successfully completed.

SQL>


SQL> conn hr/PAkistan123##@BILL_PDB1
Connected.
SQL>  create table test1 (r number);

Table created.

SQL> drop table test1;

Table dropped.

SQL>


Enable Create Table:

begin
dbms_macadm.update_command_rule(command=>'CREATE TABLE',rule_set_name=>'Disabled',object_owner=>'HR',object_name=>'%',
enabled=>dbms_macutl.g_no);
end;  
/

---Important Views:

SELECT command,rule_set_name ,enabled,object_owner,object_name from DVSYS.DBA_DV_COMMAND_RULE
WHERE COMMAND IN ('CREATE TABLE','DROP TABLE');

SELECT RULE_SET_NAME, HANDLER_OPTIONS, HANDLER FROM DVSYS.DBA_DV_RULE_SET
WHERE RULE_SET_NAME = 'Disabled';
 
SELECT RULE_SET_NAME, RULE_NAME, RULE_EXPR FROM DVSYS.DBA_DV_RULE_SET_RULE
WHERE RULE_NAME = 'Disabled';


Credit Goes:

http://oradbakar.blogspot.com/2011/12/database-vault-step-by-step-example.html
https://docs.oracle.com/cd/E18283_01/server.112/e16544/apis_dbms_macadm.htm
https://blog.actorsfit.com/a?ID=01450-3eca16ce-66a2-47e5-8671-1a072f790062
https://www.oreilly.com/library/view/oracle-11g-anti-hackers/9781849685269/ch07s02.html